Scoring is the process of cutting a number of parallel vertical lines in the bark a piece of gouged, shaped, and profiled cane. These cuts make it easier to form the cane into a cylindrical tube and help prevent cracking during the forming process. Different reed makers have various theories of scoring, involving different numbers, spacing, length, and depth of score marks. There is also quite a variety of tools one can choose from to actually perform the scoring, ranging from a $4 utility knife to Rieger’s €946 scoring machine. The tool I have used for years is close to the inexpensive end of this spectrum. It is simply a tap (a tool for cutting screw threads) mounted in a file handle.
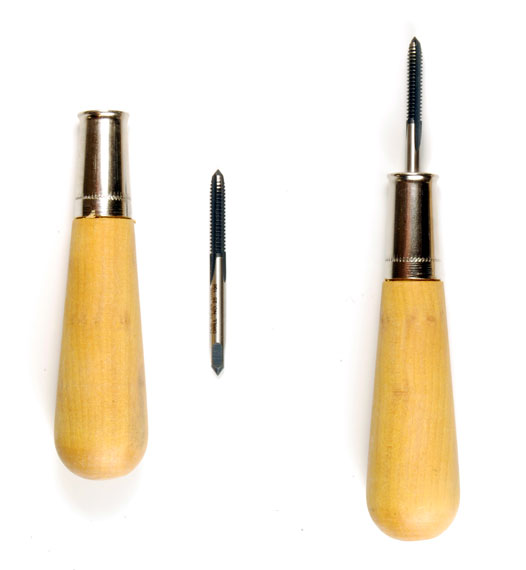
Left: file handle and tap. Right: assembled scoring tool.
I certainly can’t claim to have invented this — I saw Professor James Lotz at Tennessee Tech University demonstrate such a tool when I was a budding reed maker in high school. Miller Marketing also sells a scoring tool that looks to be basically the same thing, made by 2XReed. I don’t remember what the original tap and handle cost (I’ve been using the same scoring tool for about 15 years). But I recently made a second one to keep in my office, and the parts came to a whopping $8. Here are a tap and handle similar to the ones that I recently purchased. If you’re lucky, the tap will just fit snugly in the handle — my first tool went together that way with a simple friction fit. If you’re unlucky (as I was with my recent parts), you’ll have to glue the tap into the handle to keep it in place. No big deal. There are probably higher quality file handles out there with more consistent construction, but this is what my local hardware store had.
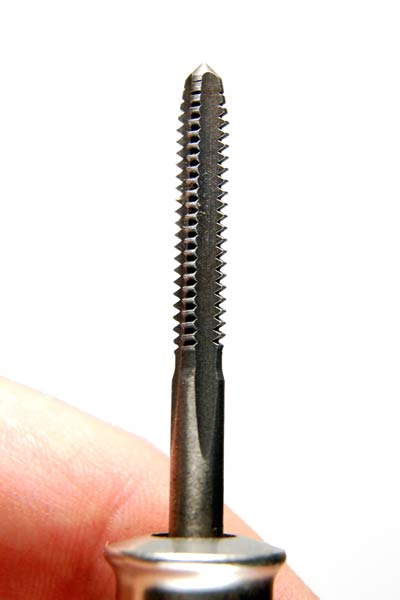
Detail of the tap
The specific size of the tap isn’t critical — you just need something with cutting teeth (close up at right) with the spacing you want to achieve in your scoring lines. I use a tap for cutting 10–24 threads; the 2XReed tap looks bigger. If you actually buy your tap at a hardware store rather than online, you can just looks at all the different choices and pick one that looks right to you.
To use the tool, first put your piece of cane on an easel. Then, hold the tool perpendicular to the cane at the point you want to start your score lines — I like to start just above the second wire. Make sure that you have the edge of one set of cutting teeth lined up to dig into the cane, apply a bit of pressure, and draw the tool straight down your cane. I like to plant my thumb on the back end of the easel and use a sort of closing-the-hand motion to help keep my lines straight. One pass with the tool with score about half the width of the cane. To score the other side, just repeat the action on the other side. You can put one tooth of the scoring tool the last existing line to keep the proper spacing and direction of your score marks. I’ve thrown together a quick animation of the scoring process:
 Click to see an animation of the scoring process |
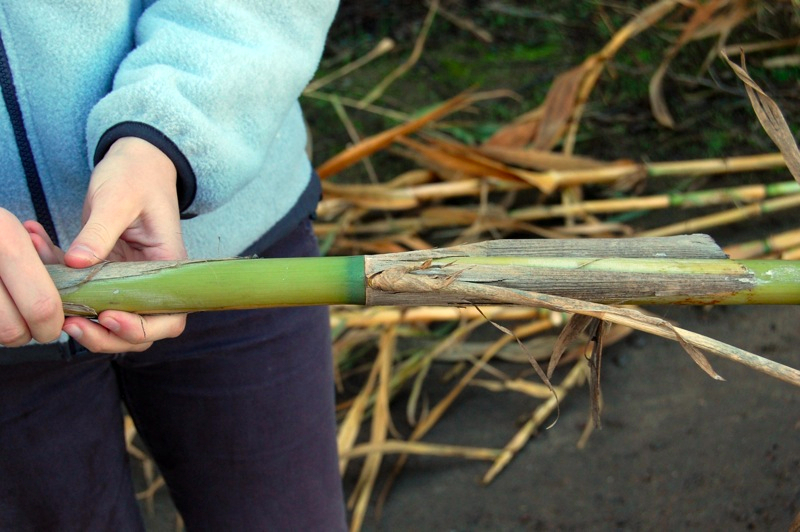
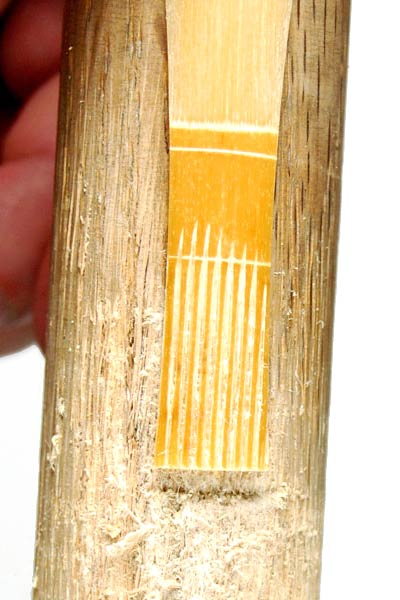 Cane after a couple of passes with the tool |
And there you have it: eight or nine perfectly parallel score marks in a matter of a few seconds. Above right you can see a piece of cane after a couple of passes with the scoring tool. I went a little too high on the left side of this piece of cane, but it’s not a big deal. It does take a little practice to align the cutting teeth properly, and also to make the first cut perfectly straight. But getting the hang of it doesn’t take very long, and pretty quickly you’ll be getting very consistent results. The one drawback of this method is that it doesn’t quite cut as deeply as I’d like; I like my scoring to go all the way through the cane at the back end. So, I typically deepen the marks with a utility knife — another pretty quick operation.